Что такое минт NFT?
Минт NFT — это процесс создания цифрового актива. Во время минта у вас есть возможность купить или можно сказать “сминтить” NFT по фиксированной цене. Если вы пропустили стадию минта, но все равно хотите купить NFT из определенной коллекции, это нужно делать на специальных маркетплейсах.
Сразу скажу, что в нашем телеграмм канале «NFT БРИХАСПАТИ» Вы сможете найти перспективные NFT проекты, раздачи от бирж, а также много другой полезной информации.. На любые Ваши вопросы отвечаем в телеграмм!
Так же занимаемся продвижением NFT коллекцией, написанием смарт-контрактов и их аудитом
Ключевое преимущество покупки NFT на стадии минта, заключается в фиксированной цене. Маркетплейсы в свою очередь разделяются в зависимости от поддерживаемых сетей. Ниже вы найдете список из наиболее популярных мест для покупки NFT:
На блокчейне Ethereum
На блокчейне Solana
На блокчейне Cardano
Начнем с описания понятий.
WL (whitelist) — это пропуск который гарантирует вам возможность минта NFT. Реализуется разными способами. WL могут получить обладатели уникальной роли в Discord проекта, участники которые проходили тестнет или участвовали в активностях. Получение WL является ключевым моментом для тех пользователей, которые хотят зарабатывать на минте NFT. Подробная информация том, какие есть способы получения WL в следующей статье.
Минт — процесс создания цифрового актива или другими словами момент, когда картинка превращается в NFT. Упрощенно можно сравнить с покупкой во время которой создается и сам товар. Во время минта вы уплачиваете определенную цену за создание NFT.
Преминт — тот же минт, только с ранним доступом. К нему допускаются пользователи имеющие WL (whitelist). В некоторых случаях цена преминта ниже чем цена минта. Таким образом пользователи с доступом к преминту получают конкурентное ценовое преимущество и имеют меньше рисков получить убытки после выхода коллекции на рынок.
Пабликсейл — момент когда минт NFT доступен для всех желающих.
Проект: ParcleМинт проходил на площадке magiceden: https://magiceden.io/launchpad/parcl
Всего коллекция включала в себя 7777 уникальных NFT из которых 3508 было выделено для преминта.
Обратите внимание цена преминта 0.40 SOL, цена минта на пабликсейле уже 0.65 SOL. Таким образом все пользователи с WL получили ценовое преимущество, а также гарантированную возможность для минта. (WL — можно было получить за тестнет)
Оставшиеся 4269 NFT реализовывались на пабликсейле. Возможность сминтить NFT была у всех желающих. В таком случае реализуется правило “Кто быстрее успел, тот и получил”. В этом моменте стоит отметить такое понятие как Gas War — газвар. Пользователи увеличивают комиссию за транзакцию с целью скорейшего выполнения операции минта. Чем большую комиссию вы готовы платить, тем скорее ваш запрос будет обработан. Таким образом они повышают шанс на минт во время пабликсейла. Однако, это увеличивает затраты и итоговую стоимость NFT. Так как спрос на коллекцию был большой, разумеется не всем желающим удалось сминтить NFT.
Спустя сутки, стоимость на открытых торгах для данной коллекции поднималась до 2.3 SOL, что более чем в 5 раз выше чем цена преминта.
Резюмируем. Преимущество преминта заключается в гарантированной возможности сминтить NFT и иногда по более низкой цене чем на пабликсейле и отсутствие Gas War.
Пабликсейл дает возможность всем желающим сминтатиь NFT, но из-за большого спроса на популярные коллекции сделать это весьма трудно. Без использования специальных инструментов, таких как боты и т.д. ваши шансы стремятся к 0.
Можно выделить 2 основных способа с помощью которых можно извлекать прибыль на стадии минта.
- Первый способ полностью продемонстрирован выше. Вы минтите NFT из популярной коллекции, а затем продаете ее на рынке по более высокой стоимости. Для 100% гарантии минта вам необходимо иметь WL. Как получить WL и какие способы существуют мы расскажем в отдельной статье.
- Второй способ, это продавать непосредственно сами WL. Допустим вы хорошо умеете получать WL но не хотите рисковать своими средствами при минте коллекции. Тогда у вас есть возможность продать свой WL на ОТС. ОТС — внебиржевой рынок. Другими словами продаете из рук в руки. Важным моментом в таком виде сделок является подбор площадки для совершения сделки и наличие гаранта. Не исключено, что Crypto Davy начнет предоставлять данный сервис.
Для участия в минте вам будут необходимы монеты сети на базе которой запущена коллекция. Ниже вы найдете несколько проверенных бирж, которыми мы пользуемся.
Huobi — Хорошая биржа с широким функционалом. Постоянно проводят масштабные розыгрыши. Есть возможность Р2Р* пополнения баланса. Регистрация тут.
Bybit —Позволяет купить токены ADA. Есть возможность пополнения счета через функцию Р2Р. Постоянно проводят розыгрыши NFT и других призов. Регистрация тут.
Binance — самая популярная и надежная биржа, где Вы сможете купить любые токены! Регистрация тут.
*Функция Р2Р — позволяет пополнять баланс, обходя блокировки карт. Актуально для граждан РФ. Суть технологии в том, что вы делаете перевод средств физическому лицу, а он в замен переводит на ваш биржевой счет криптовалюту.
Изложенная выше информация не является полным и доскональным описанием минта и всех сопутствующих тем. Мы постарались раскрыть базовые понятия, отталкиваясь от которых, вы сможете начать делать собственное исследование.
Гайд по Rarible — регистрация и минт NFT
Rarible — это один из самых приятных маркетплейсов в плане UI, все NFT, выпущенные в Rarible могут быть проданы так же на opensea самими коллекционерами (после покупки их у вас на Rarible), и плюсом ко всему — большой выбор блокчейнов, в которых можно выпускать NFT (нам нужны будут только 2, хаха ��).
Обновлено: В связи с большим кол-вом багов в данном маркетплейсе и огромными возможностями для спамеров, рекомендовать данный маркетплейс я не могу. Лучше используйте opensea, и обязательно заходите туда с подключенным VPN с локацией США или Европа (если находитесь в подсанкционных странах). Хороший vpn — zenmate.
Оглавление:
Регистрация на Rarible
❇️ Тут всё просто. Авторизуемся в своём кошельке MetaMask, и переходим на сайт — https://rarible.com/ и жмём кнопку Sign in:
❇️ Далее выбираем либо Ethereum, либо Polygon, смотря в какой сети (блокчейне) собираемся выпускать NFT, и жмём Sign in with Metamask и подписываем транзакцию в метамаске.
Новичкам и художникам без регулярных продаж советую использовать сеть Polygon. Подробный гайд по этой сети находится тут — https://teletype.in/@slynft/polygon-blockchain
❇️ Отмечаем чекбоксы и жмём кнопку Proceed:
❇️ Далее жмём на разноцветный круг справа вверху и переходим в настройки профиля:
How to Mint an NFT
This tutorial describes how to mint an NFT using the ethers library and the smart contract from the previous section.
Minting an NFT is the act of publishing a unique instance of an ERC721 token on the blockchain. Now that we have successfully deployed a smart contract to the Elastos Smart Chain (ESC) testnet, let's mint an NFT!
Creating the Mint NFT Script
Step 1: Create an Alchemy Provider using ethers
Open the repository from the previous tutorial in your favorite code editor (e.g. VSCode), and create a new file in the scripts folder called mint-nft.js .
We will be using the same ethers library to connect to the ESC testnet public RPC URL. Add the following code to the file:
Note that we are using RPC_URL. Make sure you add this to your .env file so that it looks something like this:
Step 2: Load the Contract ABI
The contract ABI (Application Binary Interface) is an interface to interact with our smart contract. You can learn more about Contract ABIs here. Hardhat automatically generates an ABI for us and saves it in the MyNFT.json file. In order to use this we'll need to parse out the contents by adding the following code to the mint-nft.js file:
If you want to see the ABI you can print it to your console:
To run and see your ABI printed to the console navigate to your terminal and run:
Step 3: Configure the Metadata of your NFT using IPFS
Our mintNFT smart contract function takes in a tokenURI parameter that should resolve to a JSON document describing the NFT's metadata— which is really what brings the NFT to life, allowing it to have configurable properties, such as a name, description, image, and other attributes.
Interplanetary File System (IPFS) is a decentralized protocol and peer-to-peer network for storing and sharing data in a distributed file system.
We will use Pinata, a convenient IPFS API and toolkit, to store our NFT asset and metadata and ensure that our NFT is truly decentralized. If you don't have a Pinata account, sign up for a free account here.
Once you've created an account:
- Navigate to the Pinata Upload button on the top right
- Upload an image to pinata — this will be the image asset for your NFT. Feel free to name the asset whatever you wish
- After you upload, at the top of the page, there should be a green popup that allows you to view the hash of your upload —> Copy that hashcode. You can view your upload at: https://gateway.pinata.cloud/ipfs/your-hash-code For the more visual learners, the steps above are summarized here: Now, we're going to want to upload one more document to Pinata. But before we do that, we need to create it!

In your root directory, make a new file called nft-metadata.json and add the following JSON code:
Feel free to change the data in the JSON. You can add or remove attributes. Most importantly, make sure the image field points to the location of your IPFS image— otherwise, your NFT will not include a photo of a dog.
Once you're done editing the JSON file, save it and upload it to Pinata, following the same steps we did for uploading the image.
Step 4: Create a Signer and an Instance of the Contract
In order to be able to call the functions on our deployed contract, we need to define an ethers Signer using our wallet's private key. Next, we need to use the contract's deployed address, the contract ABI, and the aforementioned signer to define a contract instance.
In the mint-nft.js file, add the following code:
In the snippet above, you can see that our contract's deployed address is 0xA4766Ceb9E84a71D282A4CED9fB8Fe93C49b2Ff7 . If you don't remember your contract address or can't find it on the Elastos block explorer, simply re-deploy the contract from the previous tutorial) again and note down the new address.
Step 5: Call mintNFT Function of the Contract
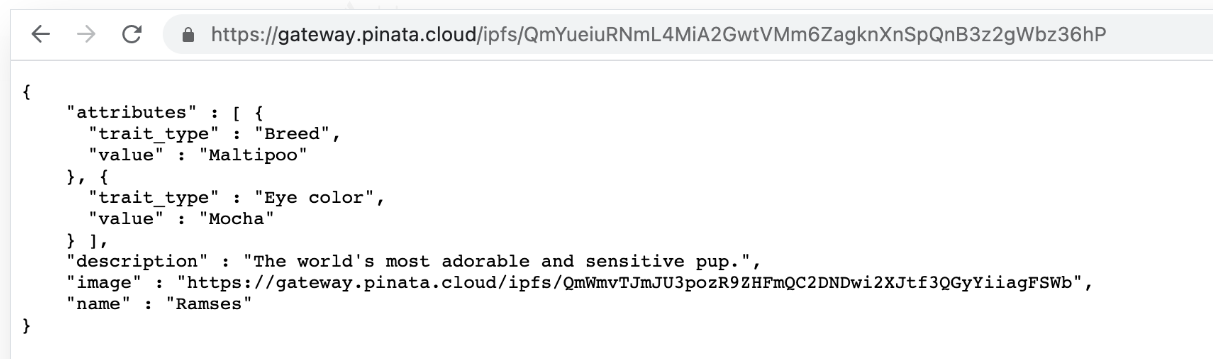
Remember the metadata.json you uploaded to Pinata? Get its hashcode from Pinata and pass the following into a call to mintNFT https://gateway.pinata.cloud/ipfs/your-metadata-hash-code
Here's how to get the hashcode:
Double check that the hashcode you copied links to your metadata.json by loading https://gateway.pinata.cloud/ipfs/your-metadata-hash-code into a separate window. The page should look similar to the screenshot below:
Now add the following piece of code to mint-nft.js to call the mintNFT function:
The final mint-nft.js file should look something like this:
Now, Let's mint our NFT by running the following command:
You should get an output that looks something like this:
You can check out your NFT mint on the explorer by following the URL above.
Step by step NFT collection minting
Non-fungible tokens, or NFTs, have become one of the hottest topics in the world of digital art and collectibles. NFTs are unique digital assets that use blockchain technology to verify ownership and authenticity. They have opened up new possibilities for creators and collectors to monetize and trade digital art, music, videos, and other forms of digital content. In recent years, the NFT market has exploded, with some high-profile sales reaching millions of dollars. In this article, we will build our NFT collection on TON step by step.
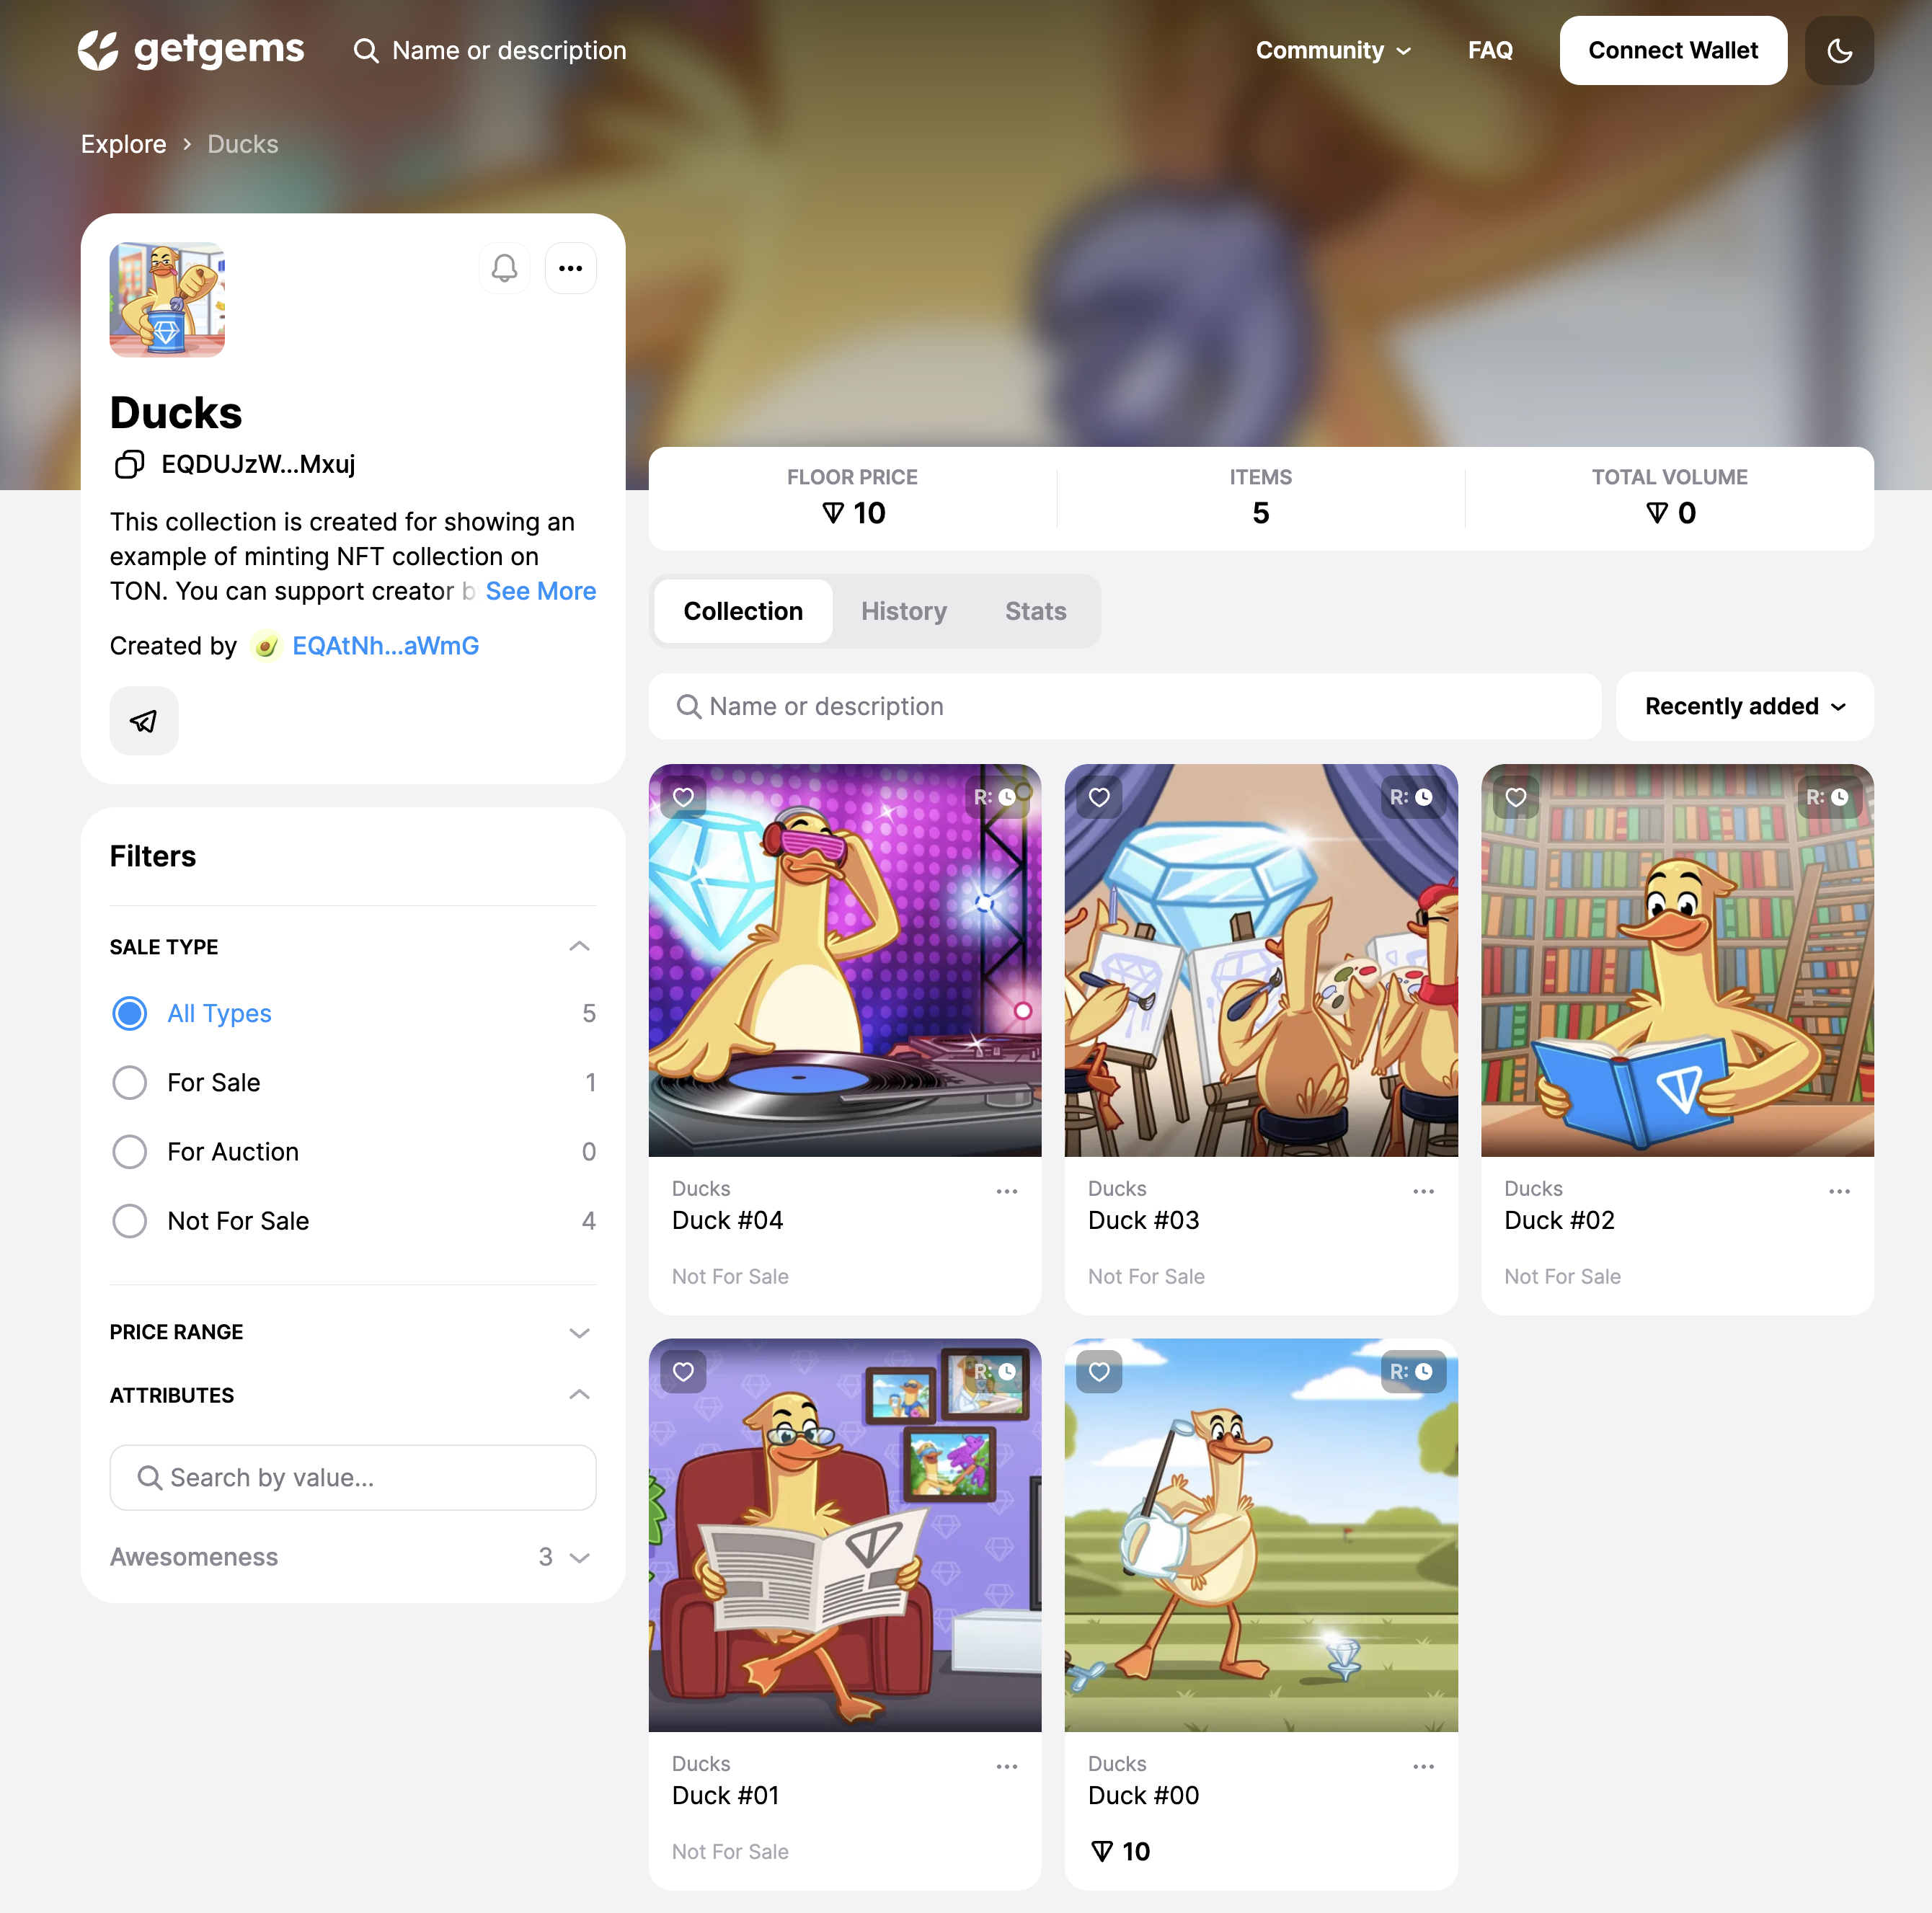
This is the beautiful collection of ducks you will create by the end of this tutorial:
�� What you will learn
- You will mint NFT collection on TON
- You will understand how NFT's on TON works
- You will put NFT on sale
- You will upload metadata to pinata.cloud
�� Prerequisites
You must already have a testnet wallet with at least 2 TON on it. It's possible to get testnet coins from @testgiver_ton_bot.
How to open testnet version of my Tonkeeper wallet?
To open testnet network on tonkeeper go to the settings and click 5 times on the tonkeeper logo located in the bottom, after that choose testnet instead of mainnet.
We will use Pinata as our IPFS storage system, so you also need to create an account on pinata.cloud and get api_key & api_secreat. Official Pinata documentation tutorial can help with that. As long as you get these api tokens, I'll be waiting for you here.
�� What is it NFT on TON?
Before start of main part of our tutorial, we need to understand, how actually NFT works on TON in general terms. And unexpectedly, but we will start with an explanation of how NFT works in ETH, in order to understand what is the peculiarity of the implementation of NFT in TON, compared to the usual blockchains in the industry.
NFT implementation on ETH
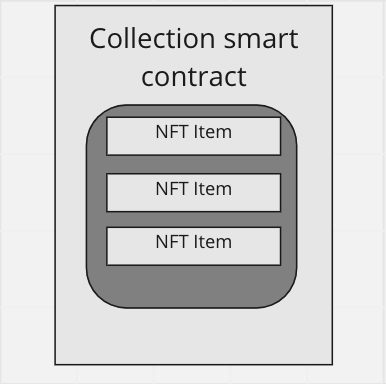
The implementation of the NFT in ETH is extremely simple — there is 1 main contract of the collection, which stores a simple hashmap, which in turn stores the data of the NFT from this collection. All requests related to this collection(if any user wants to transfer the NFT, put it up for sale, etc.) are sent specifically to this 1 contract of the collection.
Problems that can occur with such implementation in TON
The problems of such an implementation in the context of TON are perfectly described by the NFT standart in TON:
Unpredictable gas consumption. In TON, gas consumption for dictionary operations depends on exact set of keys. Also, TON is an asynchronous blockchain. This means that if you send a message to a smart contract, then you do not know how many messages from other users will reach the smart contract before your message. Thus, you do not know what the size of the dictionary will be at the moment when your message reaches the smart contract. This is OK with a simple wallet -> NFT smart contract interaction, but not acceptable with smart contract chains, e.g. wallet -> NFT smart contract -> auction -> NFT smart contract. If we cannot predict gas consumption, then a situation may occur like that the owner has changed on the NFT smart contract, but there were no enough Toncoins for the auction operation. Using smart contracts without dictionaries gives deterministic gas consumption.
Does not scale (becomes a bottleneck). Scaling in TON is based on the concept of sharding, i.e. automatic partitioning of the network into shardchains under load. The single big smart contract of the popular NFT contradicts this concept. In this case, many transactions will refer to one single smart contract. The TON architecture provides for sharded smart contracts(see whitepaper), but at the moment they are not implemented.
TL;DR ETH solution it's not scalable and not suitable for asynchronous blockchain like TON.
TON NFT implementation
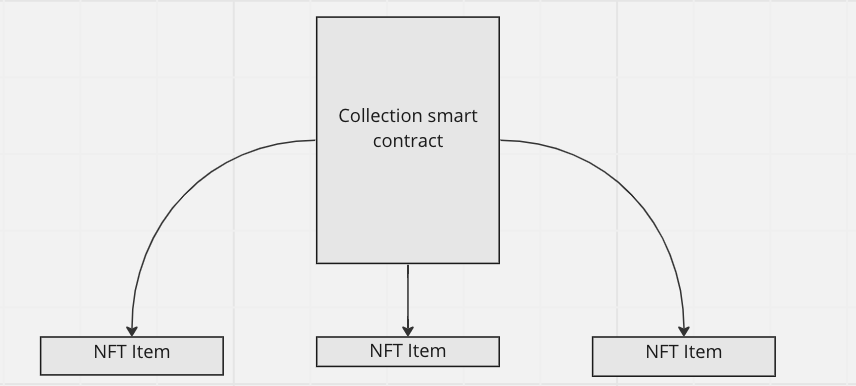
In TON we have 1 master contract — smart-contract of our collection, that store it's metadata and address of it's owner and the main thing — that if we want to create("mint") new NFT Item — we just need to send message to this collection contract. And this collection contract will deploy contract of new NFT item for us, with the data we provided.
You can check NFT processing on TON article or read NFT standart if you want to dive deeper into this topic